Showing posts with label worker placement. Show all posts

Monday, 11 August 2025

Federation


The Game

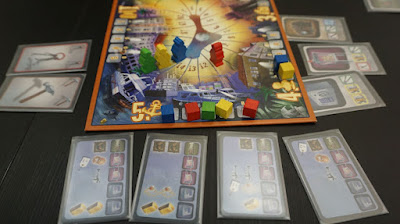
Federation is a game about interplanetary politics. It is a heavy Eurogame which uses worker placement as the core mechanism. The main playing area is the senate. It is divided into two halves, and each will support a different bill every round. Each half is a 3x3 grid of 9 spaces you can place workers - your politicians. The position you place your worker gives you a benefit (in typical worker placement fashion). It also determines which bill you are supporting, and which level of the senate you are gaining influence in. This is the interesting part of the game. When placing a worker there are several considerations to ponder. 


Many actions in the game let you gain influence in specific planet systems. As your influence increases, you get different benefits from these systems. Some give you resources and let you trade for better resources. Some let you produce resources every round. Some give you special abilities. Having influence in the planetary systems is relevant to the bills being voted for every round. The bills are in the form of players scoring points based on their influence in a specific system. So of course you want the bill related to a system you have strong presence in to pass. 


There are missions to complete. You need a specific action to gain access to these missions. You also need to spend resources if you want to maintain this access. This is tricky. If you are not quite ready to work on the missions, gaining access will be wasteful. When you have access but don’t think you’ll be using it for the moment, you may feel like “letting the membership lapse”. However if you do, later you will to spend effort to get the membership again. Is saving the trouble later worth the resource now? 


There is a race element in collecting discs of different colours. At every planetary system there are discs to be collected when you reach certain influence thresholds. There is only one disc per threshold, and it goes to whoever is first to reach that threshold. You can only take one disc per system. Even if you are first to the next threshold you don’t take the next disc. However claiming the first disc has forced your competitors to work harder for their first disc. They need to get to a higher threshold. Gaining influence in multiple systems is important because the points from having many discs is significant. 


The Play

I think of the game as a complex matrix. There are multiple layers you are competing in at the same time. When you make one decision, you have to consider several implications. There is resource collection and management. Some actions cannot be performed if you do not have the resources, and resources are tight in this game. 

The game is a complex progress management challenge. You want to increase your influence in the many planetary systems, the question is which ones first and how far do you want to go. 

The Thoughts

There is a lot to juggle in Federation. If you like challenging resource management games, this is one of them. The race to exert influence and grab discs can be brutal. 

Sunday, 25 May 2025

Fromage


The Game

Fromage is French and it means cheese. So this is a game about making cheese. The quirk about this game is the rotating game board. It is divided into four segments. On your turn you can only do things in the segment facing you. Your opponents perform actions at the same time, but in their own segments. Once everyone is done, you rotate the board, and you get a new segment facing you. 

This is a worker placement game. You have three workers who make white, yellow and blue cheese respectively. You place them on the board to do stuff. The more powerful the action, the longer they stay at the spot. If you send them to do long tasks, you may find yourself having no worker to assign on your next turn, because they are still busy. Many things you do will let you place a cheese marker on the board. These score points in different ways when the game ends. The game ends when one player uses all his cheese markers. 

On your turn you can place at most two workers, one to collect resources, the other to make cheese. Making cheese means placing your cheese marker on the board, permanently claiming a spot. Each spot is associated with a specific cheese type (white, yellow or blue) and a grade (bronze, silver or gold). To claim a spot you must use a worker of the matching cheese type. The grade is an indication of how valuable a spot is, and how long your worker will be stuck there. Usually the higher grade spots will give you more points. 

The four segments are like four different mini games. One segment has tables with two spots each. Every cheese placed is worth points but the more fully claimed tables you have (i.e. claiming both spots), the higher the value of every cheese. One segment is a map of France divided into six regions. You place cheese to exert influence over the regions. Every region is scored at game end, giving points to those with the most influence. You still get points if tied for most influence, but it is much lower than if you are the sole winner. 

One segment has multiple shelves, each giving a different benefit. Your cheese score additional points at game end when they occupy multiple shelves. The last segment is a grid and you score points by having cheese on connected squares.

You have a player board where you keep track of your resources. Building materials you collect can be used to construct buildings, which give you special abilities, like scoring bonus points based on certain criteria, and having a personal worker placement spot. Livestock you collect can be converted to specific cheese types and placed on the board. This is a way to place more than one piece of cheese on your turn. Fruits you collect are needed for some spots on the board which require some special cheese which contain fruits. Cards you collect are missions you can complete to get more points. 


The Play

There seem to be many rules, but they are all simple. It’s like playing four simple games at the same time. Planning how to use your workers can be a little tricky, because you only have one for each cheese type. If there is a particular spot you want to claim two turns in the future and it’s a blue cheese spot, you’d better make sure your blue cheese worker is freed up by then. 

There is competition at all four segments. You will be fighting for spots. Sometimes you want to claim a spot just for the sake of denying an opponent, even if it doesn’t help you much. You want to somewhat focus on a few areas. Generally the nature of scoring is the more you invest in an area, the bigger the returns per cheese. Having some focus is better than doing everything evenly. 

You have to watch your opponents. You need to have a sense of how soon the game will end, and plan accordingly. This is a game which requires some planning ahead. You have to plan the jobs for your workers, so you have to consider the other segments which are not in front of you, not just the one you can act in now. 

The Thoughts

Fromage puts a fun twist in worker placement. Each of the mini games aren’t particularly exciting, but the overall package is an interesting experience. There is no directly attacking your opponents, but you can certainly be nasty by blocking the spots they want. Most of the game is open information. Everyone can tell what you want to do. I played the digital implementation of the game. I’m sure it would be even more fun with the physical copy. You get to play with a lazy Susan. This is a light strategy game which will work for families. 

Tuesday, 9 January 2024

Barrage


The Game

Barrage is a recent and popular heavy Eurogame. Set in a fictitious 1922, it has nations vying for power, literally. They compete to build hydroelectric dams to generate power. You will be constructing all sorts of structures and completing hydroelectric projects. You compete for choice locations for dams and power stations. You will get to manipulate the flow of water. The core mechanism in the game is worker placement. This is a development game. 


This is the main game board. On the right you have a map with four rivers. They begin as four rivers upstream, but they will gradually merge, and by the time they get downstream, there are only two rivers. There are lakes along the rivers, and these are where you will build dams. The left side of the board has the worker placement spots. The actions you can perform are listed here. 


This is a player board. There are four types of structures you can build. These game pieces are unique for every player, but the functions are the same. 


The four structure types are dams, dam extensions, conduits and powerhouses. You need dams to hold water. Without dams, water simply flows downstream. To generate hydroelectricity, the first thing you need to do is to capture water using dams. A basic dam stores one ton of water. If you add extensions to a dam, you can store up to three tons of water. If the water flow exceeds the capacity of a dam, the surplus water continues to flow downstream. Conduits divert water to powerhouses, and the powerhouses generate electricity. 


The icons on the left side of the player board show the costs for constructing each type of structure. The costs vary depending on where you build. It is generally more expensive to build upstream in the mountains. Above some of the pieces you can see rewards shown. You gain these rewards when you build those specific pieces. You must build starting from the leftmost piece. 


Those on the left are your workers. At the top right you have money. At the bottom right you have tools. Tools are a resource type. They don't behave like a currency though. 


This is the construction wheel. Everyone has one. When you perform the build action, you need two things. First you need one of those fan shaped tech tiles, which specify what kind of structure you can build. You also need some tools. The brown ones are excavators, the grey ones mixers. To build a structure on the main map, you place the tech tile and the required tools into one segment of the construction wheel, and turn the wheel one step. The tech tile and the tools are now temporarily tied down in the wheel. They need to go full circle before they are released. The wheel normally only turns when you perform a build action. However there is a type of action which let you turn the wheel to speed up the release of your tech tiles and tools. You don't actually expend your tools like a currency. They are just temporarily committed to the wheel. 


The worker placement spots for the build action is on your player board, so you don't need to compete with your opponents. Most worker placement spots are on the main board. The first time within a round you perform a build action, you only need to place one worker. The second time round you'll need two, and the third time three. You can do it a fourth time. It'll still take three workers, but you'll also need to pay money. 


This section of the main board tracks how much power you have generated during a round.  Every round there is a minimum requirement to meet. If you achieve that, you get some benefit. If you don't, there's a penalty. Every round the player who generates the most power gets a prize. 


These are the worker placement spots on the main board. The number of workers needed vary from one to three. The spots with red borders require an additional cash payment. 


This small side board has worker placement spots too. You use this to buy new tech tiles. They are better than the basic tech tiles you get at the start of the game. You will be able to build more efficiently, and you will have more flexibility. 


These are contracts. When you generate power, if the amount of electricity generated meets the requirement, you may complete the contract and claim the associated rewards. Rewards can be victory points, money, water, resources and other bonuses. Taking a contract is one of the worker placement actions in the game, so it's something you need to compete in too. 


The lakes in the game all have two dam construction spots, one upstream and one downstream. The upstream spot costs money and is the better spot. You have priority in catching water. Only surplus that you cannot store flow through to the second (downstream) dam. If you can afford it, it's probably better to pay for the upstream spot. Conduits will divert water from the upstream dam to a powerhouse, and this water will not reach the downstream dam. The conduit paths in the game usually cross to other rivers. 

The Play

The game is played over 5 rounds. You have 12 workers to use every round. However this doesn't mean you'll perform 12 actions. Many actions take more than one worker. To be able to generate power, you need quite a few things in place - dam, conduit, powerhouse, and of course water as well. You will be performing actions to put things together. You compete with other players for choice locations and water. During game setup, you already know the rainfall for all five rounds, so you can somewhat plan ahead. One action in the game allows you to create rainfall, so you are not relying only on the predetermined rainfall. 

We played some rules wrong, which made the game easier for us. We misplayed the construction costs. In the early game we all built in the mountains (upstream). It should have been quite expensive. Normally players would start construction on the plains (downstream), then expand upriver as they became wealthier and could afford it. This expansion would normally lead to disruption due to how water from rivers will get diverted by conduits. This disruption is what makes the game challenging and interesting.  In our case, we started development upstream then expanded downstream. So we didn't have the kind of disruption I'd expect to see in normal games. Our later expansions let us use water more times for generating power. 

Another rule we played wrong was the special player abilities. We used them right from the start. Normally we should have access to them only after we build our third powerhouse. We made ourselves more powerful than we should have been. 

The game components are pretty

By late game the board was quite full (4 players, i.e. max player count)

By game end there were still some structures I hadn't build

The Thoughts

Barrage is the quintessential heavy Eurogame. It's a worker placement game and a development game. You patiently build the multiple structures needed to complete hydroelectric projects, and you generate power. There are several ways you earn points. On the map you compete for locations and water. 

I don't find anything particularly new or interesting in Barrage. I can understand why it is popular. I can see the strategic elements. The setting is interesting - an alternative universe set in the 1920's. Hydroelectricity is a rare topic in games. Barrage doesn't entice me to play again because I prefer to experience something new. I like games which surprise me. It feels too same-old to me. If you like heavy Eurogames, you will find the game familiar and comfortable. It's currently ranked 34 on www.boardgamegeek.com

Friday, 24 February 2023

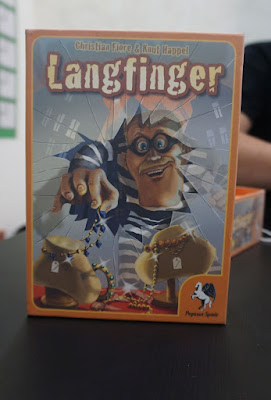
Langfinger / Sticky Fingers

The Game

Langfinger / Sticky Fingers is a 2009 game. It is an entry-level worker placement game. You are thieves breaking into homes, stealing valuables and selling them to collectors. Whoever is first to earn $20 wins the game.  


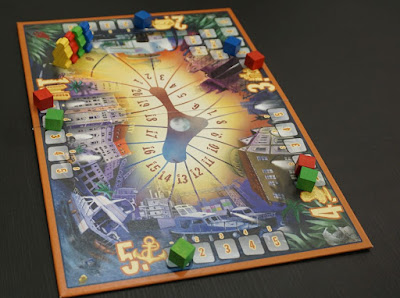
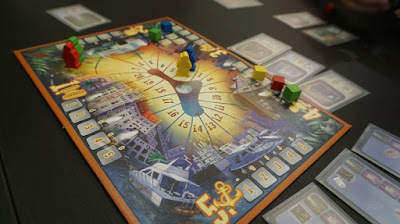
The cubes are your workers, and the pawns are your score markers. Along the edges of the game board there are five regions. These are where you get to place your workers. Everybody takes turns placing one worker at a time. The earlier you place a worker in a region, the more advantage you will have, in the form of having more options or better options. 

Once everyone has placed all workers, you start the second half of a round, which is to perform actions. You resolve actions region by region, from Region 1 to Region 5. 


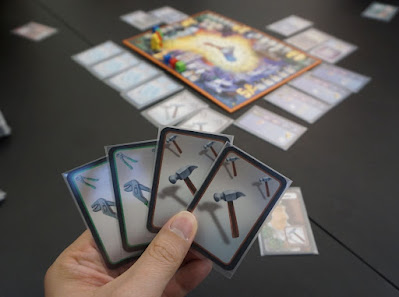
You start the game with a random character. Your character gives you a free tool. You get to use this tool once per round. 


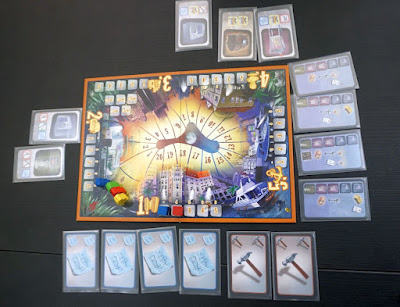
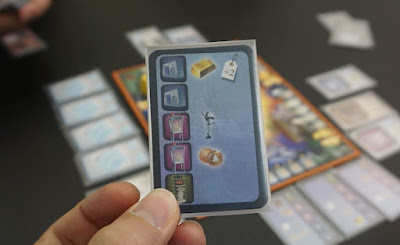
When setting up a round, you place cards along the edges of the game board. Region 1 is at the bottom. Here you have tools and whoever comes here gets to collect two tool cards. The earlier you come, the more options you have. Region 2 is on the left. Here you have treasures to steal. You need specific combinations of tools to steal specific treasures. When you steal, you consume the tools, i.e. you discard the tool cards. Naturally the earlier you attempt to steal the better it is, but being late does not necessarily mean failure. If all the players before you intend to steal a treasure which is different from the one you are eyeing, the first among them will get it, while the others may not have the right tools to steal the treasure you want. In this case you will be able to steal what you want. 

Region 3 is at the top left. You get to swap tool cards here. You discard some cards you don't want to hopefully draw cards you want. The exchange rate varies depending on which specific worker placement spot you manage to claim, e.g. 1 for 2, 2 for 3, 2 for 2. Naturally if you come early you get to claim the better spots. Region 4 is at the top right. This is similar to Region 2 in that you get to spend tools to steal treasures. One important difference is when you aim for a treasure here, you may not have all the tools you need yet. You can try to swap tools in Region 3, gambling that you'll get the tool you need.  

Region 5 is on the right. This is where you get to sell treasures to collectors. Of the many treasure types, only one converts to cash directly. For the rest, you need to find a willing buyer. 


This particular collector will buy either a gold bar, a statue or antique coins. If you sell her a gold bar, she pays $2 more. Some collectors have special demands, e.g. insisting on buying two paintings at the same time. These collectors are harder to satisfy, but if you manage to provide what they want, you save an action. You are killing two birds with one stone. 

The Play

Langfinger has high player interaction. Everyone wants to do the actions in the five regions almost all the time. You want to be everywhere but you must always pick just one spot to place your worker. The rules are straight-forward, but you are constantly presented with tough decisions. Sometimes you know you are trying your luck when you place a worker. You hope that other person doesn't take the tool you need, or doesn't steal the treasure you're eyeing, or doesn't meet the collector you plan to sell to. Many worker placement games are deterministic, but here we have a thrilling, chancy element. 

The game is a race to $20. Your progress will be irregular. A complete cycle of collecting the right tools, stealing a treasure and eventually selling it may take a few rounds to complete, and you may be working on multiple projects at the same time. The treasure you want may be taken by someone else before you manage to do it, forcing you to repurpose your tools for something else that comes along later. You have to watch your opponents closely to see whether you are aiming for the same tools, treasures or collectors. In our game the leading player was often targeted. Others tried to grab the collectors he was going for to attempt to delay him. You can see what types of treasures others have on hand, and you can use this information to deny them collectors they want. 

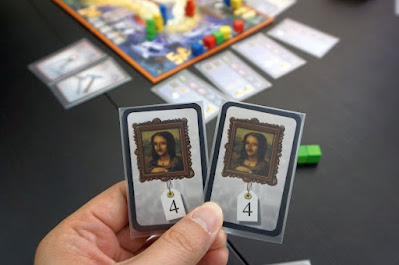
I was a little slow, but that ultimately helped because I wasn't perceived as a threat. In the final round, another player would likely have exceeded $20, but he was stopped - the collector he wanted to meet was whisked away by someone else. I had two paintings on hand, and I was fortunate to have a collector who wanted to buy two paintings. The money I earned from this transaction was enough to push me past $20. So I came from behind to win the game, benefiting from the brutal competition among the leading players. 

Tool cards


The game board also serves as a reference sheet. The number of cards to be set up in each region depending on the number of players is shown on the board. No need to flip through the rule book or look up a separate reference card. 


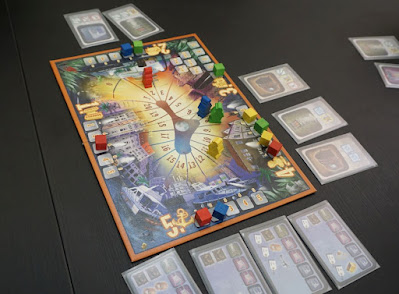
On the right there are only three treasures available but four players have placed workers (cubes). This means the yellow player placing the 4th cube is hoping that one of the earlier players will fail, leaving a treasure for him. 

These were the two paintings which brought me victory. 

Competition for collectors was fierce. All four players were here. 

The Thoughts

I classify Langfinger as a family game. The game mechanisms are straight-forward and easy to pick up, so this game will work for casual gamers. It is a light strategy game with a quick tempo. Not many rules, but plenty of meaningful decision points. It's a clean design. 

Tuesday, 8 October 2019

Caverna plus expansion

Plays: 4Px1.

The Game

Caverna is a reimplementation of Agricola. They share many similarities, but are also different in many ways. You are farmers developing your own farms on your individual player boards. You expand your farm, plant crops, harvest them, rear animals, slaughter them for food, and so on. The core game mechanism is worker placement. The main board shows the various actions you may take. You place your worker on a spot to claim it for the round and take the corresponding action, blocking others. Every round a new action space is added, increasing your options. You may get more workers by having babies. This lets you do more per round. The number of rounds is fixed. Every few rounds you do harvesting, which involves harvesting crops, breeding animals, and most importantly feeding your family. If you are unable to provide enough food, you take a stiff penalty. At game end, you score points for many aspects of your farm, and highest scorer wins.

This summarises the similarities between Caverna and Agricola. Now let's look at the differences.

The first difference you'll see is the player board. There are two halves. The left half is a forest. You need to clear trees to make meadows and fields, meadows for animal husbandry and fields for crops. The right half is a mountain. You dig caves and tunnels to expand your dwelling, to create mines, and to install furnishings. Furnishings give you various special abilities and some help you score points. There are many types available, but only one unit per type, so you have to fight for them.

Some spaces have yellow round icons. These are food icons. When you develop a space with food icons, you collect food. Some forest spaces have black boars. Similarly when developing these spaces you claim the boars.

This is the main board. The top part are the furnishings, 48 types in all their glory, which is intimidating for newcomers. Furnishings come in three categories. (1) Orange dwellings are living spaces you need to create before you can have children, i.e. more workers. (2) Green furnishings are resource-type furnishings. They usually help you produce resources, convert resources, or save resources when doing something. (3) Yellow furnishings are scoring-type furnishings. They usually score points based on specific criteria. The bottom part are the action spaces. The actions on the left half are available right from the beginning. The actions on the right half are made available bit by bit, one new action per round.

On the furnishing tiles, the cost to build is at the top left, and the number in the yellow shield is the point value.

These are some of the action spaces. You add resources to some of them at the start of every round. When you pick an action space with resources on it, you claim all the resources.

One mechanism that doesn't exist in Agricola is adventuring. Iron ore can be used to make and upgrade weapons, and your workers can be armed and sent on adventures. In this photo you can see that many workers (coloured discs) are armed and dangerous - wearing helmets with numbers. If you look at the action spaces of the level-9 and level-8 workers, you will see shield-and-axe icons with numbers. These are adventuring icons. When you go adventuring, you get to pick a number of benefits from a list. How many you get to pick depends on the number on the adventuring icon. How many choices you can pick from depends on the weapon level of your worker. The benefits vary. Some are simply claiming a resource. Some let you develop a forest or mountain space. They may not sound like much, but adventuring actually gives you much flexibility. Often the competition is fierce on the main board for what you need to do. Adventuring is like a safety net. You can use it to help you with the area you are most lacking in.

The second card lists your choices when you go adventuring. Let's say your worker is at level 6, and your adventuring value is 2. You will get to pick two different things between 1 to 6. This card is double-sided. This side shows your choices up to level 8. The other side shows the additional choices up to level 14.

The reason I had the opportunity to play Caverna was my fellow gamers wanted to play the expansion The Forgotten Folk, which was released last year. I missed the boat when Caverna was first released. The Forgotten Folk introduces fantasy races. Every player now plays a unique race with its own strengths, weaknesses and quirks. Depending on the races in play, some furnishings are swapped out with race-specific furnishings. Such special furnishings are not restricted to be built by their corresponding races. Anyone can build them, just that generally they will jive better with their corresponding races. The large card on the right was the race I played - the Silicoids. Instead of food, my people ate rocks. I didn't care about food much. I had to worry about rocks instead.

These two cards are elements from the expansion too. Depending on the races in play, new resource types may come into play, like these two.

When developing forest spaces, you usually do two at a time, covering them with a 2x1 tile, one square being a field for crops, and the other square being a meadow. The meadow can later be upgraded to a pasture (i.e. meadow with fences) by flipping the tile over. A pasture holds two animals. A pasture with a stable (the little house) holds four. A stable on a meadow holds one animal. In Caverna you get to keep dogs (but not cats unfortunately). You don't need to worry about living space for dogs. They sleep anywhere and don't run away. In fact, they actually help you with managing sheep. A team of dogs on a meadow guards the same number of sheep plus one. One dog guards two sheep, two dogs guard three sheep, etc. At game end, every animal including dogs score 1VP. This is simpler than Agricola where you need to look up a table to see how many animals of which species score how many VP.

The green leaf icon means harvesting (and feeding your family). From Round 6 to 12, harvesting is not predetermined. You don't harvest every round, and sometimes the harvest works differently. You only get to know whether there is a harvest at the start of the round. There will be one easier harvest, where your family eats less. There will also be one harder harvest, where you must forgo either harvesting crops or breeding animals.

Rubies is a type of resource, and they are worth 1VP each at game end. At any time you can convert rubies to other resources or spend them to develop a space on your board. Normally you can only get cows by trading in one ruby and one food. At game end, you are penalised 2VP for each animal type you don't have. The difference between having no cow (-2VP) and having one (1VP) is 3VP.

The Play

The core game mechanism in Caverna is worker placement. There are many aspects of your farm you need to improve. Many things to do, and many opponents fighting with you over them. When you play Caverna, the difficult choice is always between things you are keen to do, knowing that by picking one, the other will likely be claimed by someone else. Players may pursue different strategies, so eventually actions spaces will have different values to different people. If there is something you need to do, and it's not important to others, you can probably afford to defer claiming the action space.

Broadly speaking, the aspects of your farm you need to manage are crops, animals, mines, expanding your dwellings in order to have more workers, adventuring, and installing furnishings. Occupations cards and Improvements cards in Agricola have become furnishings in Caverna. Unlike the cards in Agricola which are dealt out to players, where everyone can only play from his hand, in Caverna the whole pool of furnishings is accessible to everyone. There is no luck of the draw and you have freedom to decide what to install, but you may have competitors going for the same strategy and the same furnishings. In base Caverna players start on equal footing. Only in the Forgotten Folk expansion you get different starting positions, abilities and handicaps due to the races.

Caverna is a mid to heavy weight game, not something I'd recommend for people new to the hobby. I think it will be overwhelming, especially the furnishings.

Allen, Kareem, Dennis. This copy of Caverna is Kareem's. He has custom storage trays which save some space when playing and also help a lot in packing the game away. This game has a ton of components.

One furnishing I installed gave me free wood for the next seven rounds, thus these wood pieces placed this way on the main board to remind me to collect them in upcoming rounds.

I had many dogs. Two were idle now and were playing in the forest by themselves. One was guarding two sheep. My pasture with a stable could actually keep four sheep. I just hadn't reorganised my sheep yet. The starting dwelling can keep one pair of animals, and I had a boar in my bedroom now (hmm... that doesn't sound right...).

This was Allen's player board. That grey animal is a donkey. You can keep one donkey at each mine.

In the late game, I managed to completely develop every space on my board. On the right I have three tunnel and cave spaces not yet furnished. Caves can be furnished, and tunnels can become mines. Now I had 7 dogs and 9 sheep. My animal husbandry went very well, due to lack of competition. Both Allen and Kareem's races were poor at developing the forest, so they focused their efforts on the mountain side of their boards. Dennis wanted to build the archery range, which needed empty meadows, i.e. no pastures and no animals. I more or less had free rein.

This was the second last round. On the main board, only one last action card was not yet revealed, the one for the final round. Caverna has more harvests than Agricola, 8 harvests over 12 rounds, compared to Agricola's 6 harvests over 14 rounds. However the harvests in Agricola are more difficult. It is not easy to prepare enough food. In Caverna making food is more convenient, and harvests less daunting.

This was Allen's player board. His race was poor at developing the forest, so he mostly worked on the mountain. At this point he had three iron ore mines and two ruby mines. Mines are worth VP. He had only developed three forest spaces.

Furnishings are printed on the furnishing boards so that you know where to place which one. They are organised by category so that it's easier to analyse and compare.

This was Kareem's player board. Some of the tiles on the mountain half were overhanging. This was due to a special ability of his race. He scored points for doing this. The yellow pawn on the right is the start player marker.

This was Dennis' player board. He had three consecutive empty meadows, arranged as such so that he could build the Archery Range and score the full 10VP for it. 10VP is a big deal. Dennis also planned up front to have many children. He built the Couple Dwelling, which could fit two workers. There was only one Couple Dwelling in the whole game and he beat everyone to it. He also built the Additional Dwelling (also unique) which let him have a sixth worker. Normally a player can only have at most five workers.

This was my player board at game end. I won at 99VP. Kareem and Allen's races were conflicting, which made the game tough for both of them, and I became the indirect beneficiary. Not just in animal husbandry but also in crops. At this point I had much fewer dogs and sheep, because I had converted many of them to money. The Sheep Market let me cash in sets of 1 dog and 2 sheep at $4 per set. Normally 1 dog and 2 sheep would be worth 3VP at game end. $4 is 4VP. My $20 was all earned from selling dogs and sheep. The Food Chamber (top right) also helped me tremendously. Every grain + pumpkin pair gave me 2VP. This furnishing gave me 18VP!

The Thoughts

Caverna is a different Agricola. Many things are similar, but there are many differences too. The differences are not superficial. The underlying economy and balance are different. I find it more forgiving. Harvests are not as suffocating. Adventuring is a backup plan you can fall back to if you are acutely short of something. Some things are simplified, like animal husbandry scoring. Also baking bread and cooking meat is easier - fewer steps. Compared with Ora et Labora and Le Havre, Caverna is still the most similar to Agricola. It's not an improved version, nor is it an inferior and gentler version. It's just different.