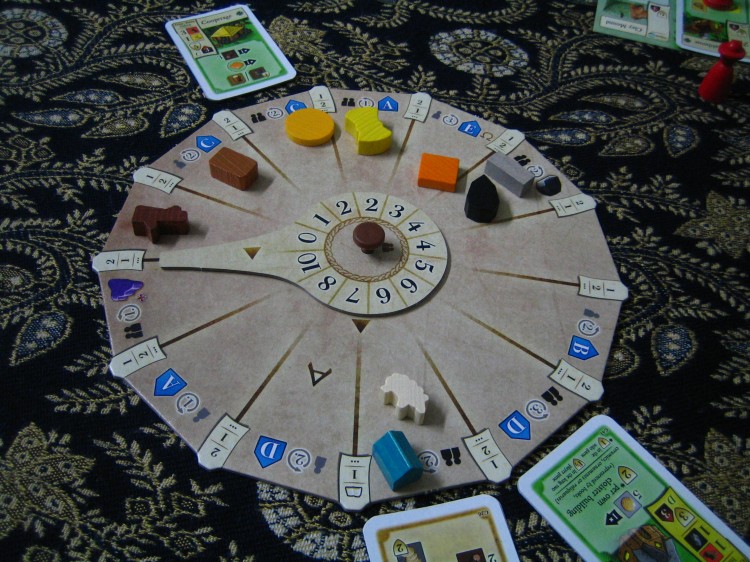
Showing posts with label Uwe Rosenberg. Show all posts

Tuesday, 13 January 2026

New York Zoo

I didn't know this was an Uwe Rosenberg game until halfway through the game. It being a polyomino game should have tipped me off. The polyominoes in this game are animal enclosures in a zoo. Everyone starts the game with an empty zoo. You collect enclosure tiles to place in your zoo. You also collect animals to place in these enclosures. Animals will breed. Whenever an enclosure is fully occupied with animals, you get to claim a bonus tile. Your goal is to be first to completely fill your zoo with tiles. 

The main game board is that long piece at the top. It is a long circular path with many stops. On your turn you move the common pawn (the elephant) along this path, taking up to 4 steps at a time. Depending on where you stop, you claim either an enclosure tile or two animals. You then place them on your player board. 

The orange spots on the main board are not stops, they are breeding points. You can't stop there, but whenever you pass a breeding point, that particular animal type breeds. In any enclosure with at least two animals, you get one new animal. Yes, just like in Agricola

You have three temporary storage cages for animals on your player board. 

These along the bottom are special tiles you can claim whenever you fill an enclosure with animals. Quantities are limited except for those tiny single square tiles. Everyone will be fighting for the large ones. These help you fill your zoo faster. 

The game offers a pleasant play experience. It is light so I'd group this under the family game category. There are several tactics you can employ. There is some strategy to consider. The enclosures are of different sizes. One consideration is the balance between bigger enclosures helping you fill your board faster, and smaller enclosures getting filled with animals faster so that you can claim the bonus tiles. You will be watching out for claiming pairs of animals so that you can make use of every breeding opportunity. There are ways to hinder your opponents. You can grab what you think they want. You can quickly go past the breeding points before they get a pair of animals. 

Mid game

Late game

Saturday, 12 July 2025

A Feast for Odin


The Game

A Feast for Odin is one of Uwe Rosenberg's most popular titles. This is a heavy Eurogame about the history of the Vikings. You manage a Viking tribe. You will get to farm, fish, hunt, mine, raid, discover new lands and also settle new lands. This is a worker placement game. This is also a game of polyominoes - you use them to fill up your player boards. Uwe Rosenberg has many games which use polyominoes. 


The board on the left is the main board. This is where you place workers to claim spots in order to perform actions. There are close to 70 different spots. When I first saw this it drove me nuts. This is analysis paralysis hell, or listening-to-long-rules-explanation hell. When you place your workers, you get to do things like collecting resources, upgrading them, converted them to other resources, and claiming new player boards. The main board is divided into four columns. To claim a spot in the first column you only need one worker. The spots in the second column require 2 workers. The third column 3 workers, and so on. The more workers an action requires, the more powerful it is. 

The board on the right is your player board. You can place your green and blue resources (the polyominoes) here. You can use coins to cover spots here too. There are three main elements to highlight. First, the diagonal line of coin icons. This is your income track. Along this line, the lowest number still visible is your income at the start of every round. So you want to cover as many of the smaller numbers as possible. You can't just cover the coin spots. For each coin spot you want to cover, you must first cover all other spots to its left, below it, and to its lower left. This means you will be filling your board from the lower left corner, and you have to fill a complete square growing towards the top right. This is how you gradually increase your income.

The second thing to highlight is those spots which show a resource. You need to surround these spots to be able to produce these resources every round. The third thing is that swath of negative point spots. Before the game ends you must try to cover most if not all of them. Otherwise, you will lose points. 

Throughout the game you have opportunities to claim additional player boards. They are farmhouses you can build and islands you can discover. They help you score points, generate income and produce resources. However there are risks when claiming them, because if you fail to fill them up sufficiently, you will be losing points. 


This part of the player board is the banquet table. At the end of every round you must hold a feast for your tribesmen. Your tribe keeps growing every round, which means you need to prepare more and more food. Red and orange resources are food. After a red resource is upgraded to green, it becomes merchandise and you can't eat that anymore. In case you don't have enough food, you can give your people pocket money (see the coins in the screenshot above). They are okay with that. When preparing the feast, resources of the same colour must not be adjacent. That is why my food platters alternate between red and orange. To reduce this food demand, you can place ships here. What this means is you are sending some of your people off to live in colonies. They'll take care of themselves and you don't need to feed them at HQ anymore. Sacrificing your ships this way means you will have fewer ships for activities like whaling and raiding, but in addition to reducing the food requirement, this also gives you points. 


There are many resource types in the game. These are just those in tile form. There are also resources in the form of wooden pieces, like wood, stone and iron. Resources in tile form have four grades, the lowest being orange and the highest blue. You can upgrade them through the levels. Red and orange are food you can feed your people with. Green and blue are merchandise used for filling your player board. 


Bear Island is an additional player board you can claim. The 12 at the top right means victory points. The 22 at the top left tells you this board starts with a penalty of 22 points. You need to fill the board up to avoid or reduce this penalty. At this point I still had four spots to go, but eventually I managed to fill up the whole thing. Notice that green tiles must not touch one another. Blue is fine. This is another thing you have to manage and plan for. 

The game is played over a fixed number of rounds, after which the highest scorer wins. 

The Play

The first time playing the game, I spent a lot of time studying the main board. There are so many different things you can do it is daunting. Ultimately it is about collecting resources and tools, or resources for making tools. Some actions come with some risk. You need to roll a die to see if you succeed. Having tools for these is necessary, and the more tools you have, the higher the chances of success. Thematically, placing workers on the spots means activities like hunting, fishing, mining, raiding and so on. The game presents these as having assigned workers to obtain resources of different types. Actions can be categorised into general groups, like animal husbandry, exploration, construction, and whaling, so there are specific industries you can decide to focus on. When you specialise, you will be more efficient and productive. 

I did a 2-player game with Han, and the main board felt pretty spacious. We didn't compete hard. With more players the game will be more challenging. There were still some things I wanted to do which Han did before I could, but these were not life-and-death like baking bread to feed your family in Agricola. You should still watch what your opponents might be planning to do, and prioritise your actions accordingly. 

The game is about efficiently collecting and converting resources. The more resources you have, the more points you can score. Polyominoes are heavily used, so this is a game with a strong spatial element. You will be fiddling with tiles on your boards throughout the game. This is a fun thing to puzzle out. 


This was the final round, and I still had so many negative point spaces I hadn't filled. I was a little worried whether I had played a horrible game (as in my gameplay, not the game itself). I was rather clueless in the early game, unsure what was a good move and what wasn't. I felt I wasn't very efficient. Thankfully by the end of the round I did manage to fill up my board. I wasn't as bad as I thought. 

Han utilised the grey tiles much better than I did. There is an action which lets you buy these grey, oddly shaped tiles. They can be very helpful in filling your board, especially when you need to do weird stuff like surrounding certain spaces without covering them. 

The Thoughts

This game has a very strong Uwe Rosenberg signature. If you like his games, you'll likely enjoy this too. The game world is big. You have many options to gather and upgrade resources in order to fill your boards. This being a worker placement game means naturally there is some competition and blocking of worker placement spots. Mine being a 2-player game, the competition wasn't too intense. If there were things I wanted to do but I couldn't, there were still many other options. With three or four players this would be different. BGG says three is the ideal player count. I wonder whether this is preferred over four players because otherwise competition would be too brutal, or game time would be too long. For me, A Feast for Odin does not present anything particularly new. If I were to summarise it in one sentence, it is a game about collecting pieces to fill your board. Put that way, it sounds a little lame. It is a solid game. There are several tactical considerations which give you much to think about. If you like heavy Eurogames this is right up your alley. 

Saturday, 25 June 2022

Fields of Arle


The Game

In Fields of Arle, Uwe Rosenberg tells the story of his home region. This is a heavy Eurogame with worker placement as its core engine. It is a game about farming and small industry. It is for two players only, but with the expansion it supports three. 


This is the main game board. On the left are buildings you get to buy. They have different powers and point values. On the right you have many different action spaces for worker placement. Each player has only four workers, and this number doesn't change. You only get to perform four actions every round. One thing unique about the worker placement mechanism here is the action spaces come in two types - summer and winter. The game rounds alternative between summer and winter. In summer you can only perform summer actions, and in winter winter actions. 
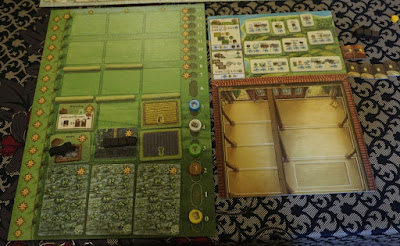

These are the player boards during setup. On the left you have your lands. You already start with some buildings and fields. You have swamps, which can be cleared for peat, one of the resources in the game. The top half of the land board is submerged under water and unusable. You need to build dikes to keep the water out and unlock more land parcels. The horizontal bars are the dikes. One of the actions you get to perform is to move them upwards. This is how you unlock land parcels. 

The board at the top right holds trade destinations. The board at the bottom right is your garage where you keep your horse carriages and other equipment. 


This trade destination board is one of the player boards. Each tile here represents a city you can trade with. You can trade with a city just once per game. You assign one of your horse carriages to travel to the city, and you sell specific goods in exchange for food. One element which is similar to Agricola is the need to pay food at the end of every round. In case you don't have enough food, there is a penalty. However in Fields of Arle you'd have to do pretty badly to be unable to afford food. Food is one of the currencies in the game and is used for many purposes. 

The left side of this board is a reference table showing the administrative steps to be taken at the end of a summer round as well as a winter round. For example harvesting crops in summer, and animals breeding in winter. 


The orange marker is the round marker. The game is played over 9 rounds, alternating between summer and winter rounds. 


The horse carriages are an important element of the game. There are many different types of carriages in different sizes you can buy. Once you have a carriage, you can use it every round. Loading stuff onto a carriage is a free action. There are two types of tiles you can load onto your carriages. The first type is destination tiles (photo above). This represents traveling to the city and doing trade there. When you supply the specific goods needed by the city, you get food in exchange. Each destination tile can only be used once. Ideally you want to supply as many goods as the city wants, fully utilising the destination tile. 

The second type of tile you can load is goods. When you load specific goods onto your carriage, you flip them over to become the upgraded version. Wood becomes timber, linen becomes summer wear, and so on. The upgraded versions are worth more points. 


There are many tracks at the centre of the action board. These represent your skill levels in different areas, and they affect specific action spaces. If you intend to perform a certain action frequently, it is best to improve your skill related to that action, so that your actions become more effective. The star icons mean point values. Some skills are worth points if you train yourself hard enough. 
 

The left edge of your land board is for keeping track of the travel destinations you have been to. Whenever you do trade with a city, you flip the travel destination tile to show the road segment at the back. You connect these road segments into one long road, and the star at the end of this road shows the points you receive for traveling. 


The track along the right edge of your land board is for keeping track of various resources. At the end of the game, if the resource markers are high enough on the track, you score points. Anywhere you see stars, there are victory points. 

This is a development game and a resource conversion game. You upgrade your farm and expand your industries. Many things get you points. The buildings are an important source of points, and the large buildings are part of your long-term strategy. You need to plan ahead for them and save resources to be able to afford them. You need to beat your opponent to them too, since there is only one copy of each building. 

The Play

The first play was a little daunting, since there were many different actions to digest. The game has many moving parts. Essentially this is a resource conversion game. You produce different types of resources, you then spend them to get other resources or you upgrade them to become more valuable resources. The game does tell a story and different aspects of farming life in Arle. They are represented by resource production and conversion, ultimately into victory points. In terms of game mechanisms, there are some interesting ideas, but nothing particularly innovative. If you like Uwe Rosenberg's style you will feel right at home. The game feels familiar and comforting. 

Variability comes from the buildings. Some buildings are picked randomly during setup. I have only played one game, so I can't say for sure that different building combinations will drastically change the game. I believe it will affect how you play. 

You need to focus on some areas, for example maybe you want to be a good weaver, or a butcher. If you want to be good at something, i.e. to be efficient and productive, you have to invest time to learn and hone your skills. You also need to make sure you have the right equipment and production facilities. All this means you have to plan your actions to be coherent. Focus on a few things, and be good at them. The strategic space is wide and you can explore different areas of focus from game to game. 

Four of the buildings are cheap, and they provide benefits every round. They are affordable in the early game. In our game I bought three, and Allen one. I soon realised these early game buildings were intended to be fought over by the players, and each player was expected to claim two. These early game buildings would define the strengths of the players and pull them in slightly different directions. Since I had two more buildings than Allen, this gave me a large advantage, and it was cumulative. He did manage to beat me to buying a peat boat and a plough in the early game. However the early buildings were more powerful. 

A good general principle to hold on to is to maximise every action you take. You will only ever have four actions every round. There is no family growth and no increase in actions. To do more, you have to make your action more effective. Some actions let you do two things. Ideally you want to time your action to allow you to do both. You also want to increase your skills in specific areas, so that when you take those related actions, you receive more resources or get more work done. 

This was Allen's garage. He had more equipment than I did. 


One interesting twist is every round one player may perform an out-of-season action. E.g. you may perform a summer action in winter. There is a cost to it though. You have to surrender the start player token to your opponent. 


I only had large carriages in my garage. I could not fit in any more by now. I had many fields because one of my early-game buildings gave me a free field every round. 

Animals produce milk. Sheep produce wool too. The dikes have space for one animal each. 


At game end, only the animals types in which you have the fewest of and second fewest of score points. That means you want to increase your animal count evenly for every animal type. There is no point having many animals in just one type. It wouldn't score points. 

Despite being a 2-player game, Fields of Arle takes up much space.

The Thoughts

Fields of Arle has the Uwe Rosenberg signature. It is a heavy Eurogame. It has worker placement. It is about farming. Most of the game mechanisms are familiar to those who have played his games. There are some interesting quirks, which are nice. Just don't expect anything earth-shattering. I imagine this is a very personal game to the designer. It does feel like he is taking you on a tour of his home region where he grew up. 

Saturday, 1 July 2017

Cottage Garden

Plays: 3Px1, 2Px1.

The Game

Cottage Garden is a light game from Uwe Rosenberg (Agricola, Le Havre). It has the Tetris-like puzzle element, similar to Patchwork and A Feast for Odin.

Every player has two 5x5 player boards. These are your flowerbeds. Your job is to fill them up with the Tetris-like pieces, which are mostly flowers (some are other garden decorations or equipment). Each time you fill up a flowerbed, you score points, and then get a new flowerbed to start over. There are flower pots and plant covers on the flowerbeds. You want to keep them exposed as much as possible, because they are what score points for you. The L-shaped piece on the left is your score board. When you score flower pots, you may advance any one of the orange scoring markers. When you score plant covers, you advance a blue marker. Notice that each step a flower pot marker advances gives you 1pt, while a plant cover marker gives you 2pt per step. Also, between 14pt / 15pt and 20pt, there is only one step, so it is a steal if you manage to get there.

The cat pieces are 1x1 pieces which help you fill up your flowerbeds. They don't score points, but they are convenient and they can be used at any time.

This is the main board, called the nursery. During game setup, it is filled with flowers tiles. Players claim flowers from this board to add to their individual flowerbeds. The die is a countdown mechanism. At the end of every player's turn, it is moved one step clockwise. When it completes a full circuit around the board, its value is increased by one. When the value reaches 6, the game enters the final stage. Upon entering the final stage, flowerbeds with too few flowers are immediately discarded. The game ends after the remaining flowerbeds are filled up by their respective owners. The twist is from this point onwards there is a penalty at the start of every turn you take. So you want to finish up your flowerbeds as quickly as possible. Otherwise whatever you score from them may not be sufficient to cover the penalties.

The die also determines which flowers are available to the active player. On your turn you may only choose from the flowers in the same row (or column) as the die. The active row sometimes needs to be refilled. If there is only one flower tile remaining, the row is refilled before you take your turn. Alternatively, you may spend one cat to refill it, giving yourself more choices.

Notice the tile at the top left corner of the flowerbed on the right. There is a flower pot on it. These flower pots score points too, not only those printed directly on the flowerbed.

When I read the rules, I thought the rule for the parasol was rather silly. If you need to borrow a flower tile from the main board to see whether it fits well on your flowerbed, you are supposed to place the parasol on the spot from which you borrowed the tile, so that you won't forget where you need to return the tile to. I thought that was unnecessarily cumbersome. However when I actually sat down to play, I realised it was indeed easy to forget where I took the borrowed tile from. I was humbled. The gamemakers knew what they were doing.

Flower tiles not yet in use are to be arranged in a queue beside the nursery (main board), so that players know what is coming next. The hand cart points to the head of the queue.

This is a completed flowerbed. Look closely and you will see that two of the flower pots are actually round tokens and are not printed on the flowerbed. On your turn, in lieu of taking a flower tile from the nursery, you may take one of these flower pot tokens. This sounds like a good deal, since each flower pot is worth 1pt. However flower tiles are much larger and help you complete a flowerbed more quickly. So usually these flower pot tokens are used to fill up those odd spaces on your flowerbeds which are hard to find flower tiles for. When scoring this completed flowerbed above, you move one orange marker 6 steps (for the flower pots) and one blue marker 2 steps (for the plant covers).

The nursery is double sided. Depending on the number of players, the rules are slightly adjusted and you need to use the appropriate side.

That red line at the elbow of the L-shaped board means something. Whenever a score marker crosses the line, you gain a cat. The scoring mechanism in Cottage Garden pulls you in two different directions - quality vs quantity. If you focus on advancing a single orange marker and a single blue marker, they will most likely exceed the 14pt and 15pt spots on the score track, and give you bonuses by jumping straight to 20pt. Being first to reach 20pt also gives you a bonus. This is the quality angle. The quantity angle presents two incentives too. If you advance your markers evenly, more of them will cross the red line, giving you more cats, which in turn help you complete more flowerbeds. Also, each time your third marker of a colour leaves the starting space, you gain a free flower pot. This again helps you fill up your flowerbeds.

The Play

Playing with the children.

When I explained the rules to the children, they sounded a little complicated, because there were quite a few situations I had to describe and explain what needed to be done when they came up. However, the actual playing of the game was very simple most of the time. The various situations I had to explain did come up, but not frequently. Most of the time you are just picking a flower tile and placing it on one of your flowerbeds. This is a casual and relaxing game.

There are some tactics in picking the flower tiles. You can see which tiles fit your flowerbeds well, and you can calculate whether you will have a chance to claim them. You can also check whether a tile you want is useful to your opponents. If it is, you probably want to take it before someone else does. Otherwise you can probably risk the wait. You can also look ahead at the tiles which will be soon entering the nursery. Sometimes it is worth spending a cat to bring them in early, so that you can get your hands on a particularly nice-fitting flower tile. There are plenty of little tricks to apply, but nothing too taxing.

Tempo is something to consider too. You want to time your planting such that when the game enters the final phase, your flowerbeds are either almost complete, or barely started. A mostly empty flowerbed means you can discard it without taking penalty, and an almost completed flowerbed means you will take minimal penalty before finishing up and scoring points.

I have listed quite a number of tactical considerations, but I am probably making it sound more complex than it actually is. This is a light game. Perhaps I am being influenced by the artwork. I cannot picture this being anything other than a leisurely pastime, like some quiet gardening work.

A 2-player game in progress.

Chen Rui suggested we put the flower pots in the cart, which I thought was a brilliant idea!

The Thoughts

Cottage Garden is a light family game, a casual game. There is some strategy, but it is generally relaxing and non-confrontational. The main selling point is the Tetris-like spatial puzzle element. How much you like the game depends on how much you like this core mechanism. The rest of the game are supporting mechanisms. Comparing Cottage Garden and Patchwork, in Patchwork you won't be able to fill up your player board, but in Cottage Garden you will fill it up again and again. There are many tools to help you do this. It is as if Uwe Rosenberg felt bad for teasing you in Patchwork, and now wanted to give you the satisfaction of getting the job done. Cottage Garden has more rules and more components, and thus should be more complex. Strangely, it doesn't feel so to me. In fact there is one aspect in Patchwork which makes me feel it is the deeper game. In Patchwork you need to consider the economic ramifications when you choose a tile. You need to plan for the future, you need to stay solvent (even if your currency is buttons). Cottage Garden is more pure in driving you towards completing your flowerbeds. It is a straightforward, pleasant game.

Saturday, 15 November 2014

Glass Road

Plays: 2Px2.

The Game

Glass Road is a medium-weight resource conversion game from Uwe Rosenberg. He has been doing many such games lately. He used to be famous for quirky card games like Bohnanza, but since Agricola and Le Havre, his design focus has switched to medium-to-heavy resource conversion games. Glass Road is another one of these, but it has a few interesting bits.

Everyone starts with a domain (player board) with 20 spaces, and initially most of it is natural terrain, like forests, lakes and quarries. You also have two factories, one producing glass and the other producing bricks. The factories not only produce. You also use them to keep track of your resources. It's quite nifty. Let's take a closer look.

These are your two factories. The top one is your glass factory, the bottom one your brick factory. The hands divide a factory into two segments, the larger one is where raw materials are tracked, and the smaller one is where the finished product is tracked. You must always turn the dials clockwise as much as possible, until one of the hands is blocked by a marker. Usually it would be one of the raw material markers, e.g. at both factories in this photo it is the white (food) marker stopping the long hand. The numbers on the dials indicate how many of each resource you have. When you gain or spend a resource, you move its marker clockwise or anti-clockwise accordingly. Whenever you have at least one unit each of all raw material types, there will be no marker blocking the long hand, and your factory will produce (must produce, in fact). This is done by simply turning the dial, until it is stopped again by one of the markers. By turning the dial, you decrease your raw materials and increase your finished products. That's how production works. It's automatic. You produce as soon as all ingredients are ready. This can sometimes cause trouble though. E.g. you are collecting wood to build a house. If you collect wood, but then find you now have the right materials to produce glass, your factory will immediately produce glass, and your collected wood is immediately depleted again.

This is a victory point game, and most VP's come from buildings you construct. Every round there will be some buildings on a common board available to be built by any player. Some buildings let you convert 1 unit of a resource to 2 units of another. Some buildings give a one-time benefit, e.g. a batch of resources, or the ability to modify terrain. Finally there are buildings which score points at game end depending on how well you meet certain criteria. Throughout the game you need to collect resources, produce glass and bricks, and constructing buildings, ultimately to score points. All these are done using a character card play mechanism.

This is the building board. There are three types of buildings. The top row displays resource conversion buildings. You can convert any time you like and as often as your like. The middle row is for buildings with one-time benefits. The bottom row is for end-game scoring buildings. When a building is constructed by a player, the board is not immediately replenished. It is only replenished at the start of the next round.

The character card mechanism reminds me of Witch's Brew. Everyone gets a same set of character cards. At the start of every round, you secretly pick five. You want to pick some which others won't pick, and also some which others will. Players take turns to play cards to take actions. You will only get three turns to play cards, which means out of the five cards that you pick, in the worst case you many only get to use three. Here's the catch - if the active player plays a card which someone else has also picked, then the passive player must immediately play his card too. Both active and passive player(s) will get to execute an action, but they only get to execute one out of the two actions on the card. If the active player plays a card which no one else can follow, he gets to execute both actions on the card. Ideally you want to pick three cards where you are the only player selecting them, and two cards which others have also selected. Then you'd get to fully utilise your five cards.

These are some of the character cards. The orange section is the fee that must be paid to use a character. The yellow section shows two actions.

One other consideration is the order of cards being played. If you intend to play one card to collect some resources, and then another one to use said resources to construct a building, you can be royally screwed if someone else plays the construct building card first before your building materials are ready.

The game is played over 4 rounds only, so in the best case you get to do 20 actions.

The Play

Allen and I played two games back to back. We were both new to Glass Road. It has been sitting on his shelf for some time. I find that the most important thing in the game is to analyse the available buildings. The factory mechanism is clever. The card play is tricky. However scoring and winning is all about getting the right mix of buildings to help you and to maximise your scoring. The game comes with many buildings so there will be much variability from game to game. There is competition in racing to construct buildings before they are claimed by others.

The card play can make or break a round for you. Both Allen and I experienced getting screwed by the order of cards getting played. We were caught without the resources needed to construct a building or to make use of another character card. Sometimes almost a whole round was wasted, with little being achieved. The card play can be brutal!

You do need to watch your opponent's board. There is much you can tell. If he doesn't have many lakes, but you do, then it is not likely he will pick the character which makes use of lakes. Well, unless he just wants to mess with you, which is definitely possible. You can also guess whether your opponent will compete with you for a particular building by looking at his board. If the building doesn't quite jive with his strategy, you can probably hold off getting the building for a little longer.

In our first game we took some time to digest the buildings and the character cards, but once we felt comfortable, the game play was very quick and smooth.

This is my player board, and this is not in mid game. This is almost at game end. I have only constructed four buildings. Not good. However this is partly because one of my scoring buildings scores points based on natural terrain that I have. So I have been preserving my natural beauty, even terraforming to regain some which was removed earlier.

The Thoughts

Well, Glass Road is yet another cube converter game. It has a few nifty mechanisms. It plays very smoothly and feels satisfying. I get a feeling that the factory production mechanism is a solution looking for a problem. I imagine Uwe Rosenberg being an enthusiastic mad scientist who had just discovered a new chemical and was eagerly looking for an application for it. Glass Road feels like a mechanism-first game. I think it does address a problem of cube converter games. Sometimes I get tired of these games because the many steps required to convert one resource type to the next, and then the next, and then yet again are just so much work. In Glass Road, production is free and automatic. You also get to use conversion buildings for free, at any time, and for as many times as you want. You don't need to wait for your next turn to do one step of the conversion, and then another turn to do the next step, and then another and another until you forget what you were trying to convert that lousy piece of wood to in the first place. Compared to Agricola and Le Havre, Glass Road is cleaner, and slick. It is a medium weight game, while the other two are heavier. I still like the older brothers more, despite them being a little clunkier. They have more story to tell. They feel more personal - begging for food for your family in Agricola, or progressing from a fish and chip restaurant to a steel business in Le Havre. But then maybe that's just nostalgia speaking.

What I like about Glass Road is the variability. The factory mechanism and the card play are the execution layer. The strategic layer is the building combos. With every game you need to analyse afresh the buildings on offer. The game has a bit of a tableau game feel too, like Race for the Galaxy, San Juan.

Friday, 6 April 2012

Ora et Labora

Plays: 2Px3.

The Game

Ora et Labora means praying and working. It is about developing and running a monastery in the middle ages. This Uwe Rosenberg design has many similarities to his two earlier designs, Agricola and Le Havre, especially the latter. You construct buildings which have various abilities, and you place your people on these buildings to utilise these abilities. Buildings come from a common pool, so once a player has constructed a building, no one else can construct it, but they can pay the owner to make use of it.

Each player starts with a plot of land which is partially developed, with basic buildings, limited available space for new buildings, and some forests and moors. Forests and moors can be cleared to obtain wood and peat respectively, and the cleared land can then be used for building construction. The play area can be expanded by buying more plots of land, which can give more forests and moors, and also different landscape types (coast, sea, mountain) which allow specific types of buildings to be constructed.

The monastery grounds at the start of the game. Two moors from which peat can be harvested, and three forests from which wood can be harvested. Three basic buildings, and two vacant spots available for construction.

There is a goods accumulation mechanism similar to both Agricola and Le Havre, where all types of goods will gradually accumulate until someone takes an action (e.g. using a building, clearing a forest) to claim the goods. The amount of goods drops to zero and starts accumulating again. In this game, this mechanism is implemented using the production wheel, which makes things easier to manage. This is not the core of the game though. This is just a solution to a minor problem. So, just a nice-to-have.

The production wheel. At the start of the game, the markers for all goods are piled here, at the zero space.

The production wheel during a game. At the start of every round, the hand is rotated one notch, which will increase the numbers next to some of the goods markers. This is how goods accumulate, without needing to physically add goods tiles to many piles of goods. Pretty nifty. When a certain goods type is claimed, the marker for that goods is moved to the zero space, and it will start accumulating again from zero. The little blue house is a reminder for when the next settlement phase will occur.

Some of the goods tiles in the game. These are double sided. Pot icon means food value, fire icon means energy value, shield icon means victory points worth.

The core of the game is still the buildings, and how you make use of them. There are many ways to earn victory points. There are many types of goods in the game, and some types are worth victory points. Buildings themselves are worth points too, and you need to spend resources to build them. Every building has a settlement value, and these are scored using a special building type - the settlements. Settlements can be built only at specific times during the game. If you have accumulated the required resources, you can build one. It is not mandatory, but it is usually desirable. At game end, each settlement scores its own settlement value, and the settlement values of the four buildings orthogonally adjacent to it. So you want to place settlements next to high settlement value buildings, and vice versa.

The buildings available at the start of the game. On the vertical banner on the top left of each card are: (a) terrain type the building can be constructed, (b) resources required, and (c) building score and settlement value. The little open bible icon means these are the starting buildings. The lower half of the cards are the building powers.

Unlike Uwe Rosenberg's two previous hits, Ora et Labora doesn't have a feeding phase where you must have sufficient food set aside or suffer a penalty. This is replaced by the settlement phase, where if you don't have the resources set aside to be able to build a settlement, it would be at worst a missed opportunity rather than a penalty. Depending on how you develop your monastery, sometimes you may not want to build many settlements.

The game comes with two ways to play - Ireland and France. The difference is in the buildings. Each building card is double sided so you decide up front which side you want to play. I have not studied the differences in detail. I just know that in France you drink wine and in Ireland you drink beer.

The Play

So far I have only played 2-player games. The structure and game end condition are a little different from 3P and 4P games. I am assuming the overall feel of the gameplay is similar. In the games that I have played, we seem to focus a lot on construction. Each building is worth points (both direct victory points and the potential in its settlement value), and sometimes I construct a building more for its points than because of the intention of using it. I wonder whether this is normal. That said, some buildings and building combinations are quite useful. I sometimes use my opponent's buildings, when they suit my purpose. The cost is not too high.

There is still the greed vs planning tension. When you see that a certain good has accumulated a lot, it's very tempting to grab the lot instead of sticking to what you have been planning to do. Do I grab it before my opponent does so? Should I delay constructing that building by one turn? There are often many juicy choices, which means tough decisions.

My monastery at the end of a particular game. I have 7 settlements (cards with a blue house icon on their top right corners) out of the maximum of 8. Normally there are only 4 settlement rounds in a game, but the Castle building lets you build extra settlements.

There is also that "maximising" feeling when you play this game. You want to make the most of every action. You try to build up an efficient scoring engine. You try to develop a high-scoring monastery. Many things are achieved by many small steps, so you are meticulously planning your moves and squeezing every bit out of your actions. One of your three pawns is a prior (whom I call "the boss"), and if he is idle when you construct a building, you can immediately place him on the new building as a free action to utilise the building. You want to make use of this as much as possible. There are a few such small tactical considerations throughout the game.

For 2-player games, the game does not end after a fixed number of rounds like in the 3P and 4P game. The game ends when there is only one building left in the common pool (i.e. not yet built). So there is some tension in timing the game end. If you are using some building combo to create many goods worth victory points, you may want to let the game drag longer. If your opponent is doing this, then you want to try to construct buildings quickly to expedite the game end, even if the buildings aren't high-scoring or useful to you.

Another monastery at game end. I didn't buy any mountain plots this game.

Michelle's monastery. Or maybe I should say nunnery? The buildings with the yellow banners are the monstery itself, and they must be built adjacent to one another, extending from the initial cloister office.

The Thoughts

Ora et Labora feels very familiar, because I have played Le Havre. It feels more open, and the constant pressure in having enough food is replaced by the less intimidating settlement phases. It has a spatial element in the landscapes types and the possible expansions. I can't say which is better. Perhaps it is unnecessary to do so. If you like development games this is a good choice. If you're looking for something very different from Le Havre, you'll be disappointed. Ora et Labora is a complex development game, and it has some differences from its predecessors. I see it as one more choice on my shelf when I feel like playing this type of game. There are many possibilities to pursue in this game, and I like the sense of achievement in developing my own monastery.

The level of player interaction is similar to Le Havre and Agricola, perhaps slightly less tense, not because of the type of interaction itself, but because the game system is more forgiving. In Agricola, claiming four food from the board just before harvest time can be a very nasty action to your opponent who is short on food.

From Agricola to Le Havre to Ora et Labora, the designs have shifted to be less restrictive and more open, giving more options for scoring. However I don't see the earlier designs as inferior, just different. So Ora et Labora does not replace any of its elder brothers, it adds to the family.


Noble Knight Games - Buy, sell and Trade! New and Out-of-Print RPG's, Board Games, Miniatures, Dungeons & Dragons