
The Game
Yokohama, by Hisashi Hayashi, is a heavy Eurogame published in 2016. It's a Japanese themed game designed by a Japanese, so you can rest assured the setting and cultural aspects will be portrayed properly. Mechanism-wise, this is a typical point-scoring Eurogame. I played it with Allen and Han on BoardGameArena. When I first read the rules, it seemed a little intimidating. Now that I have played it, it is not as complex as I had imagined.

This is how a 3-player game is set up. The size of the play area differs based on player count. Every tile that makes up the play area is a location in Yokohama. Each location allows you to perform a specific type of action. I consider this a worker placement game, although technically you only have one worker - your company president, who is supported by a team of assistants. On your turn, you first deploy up to 3 assistants anywhere on the board. You then move your president to a new location, and perform the corresponding action. The new location must not have another president present. This is the worker placement aspect of the game. Each location your president passes through and the final destination must have at least one of your assistants. Think of the assistants as always going earlier than the president to make appointments, arrange travel logistics and book accommodation. Once the president reaches the new location, you check your Power at the location to determine how strong your action is. The president and the assistants each contribute 1 Power. Each building you own also contributes 1 Power. Once you complete your action, all assistants at the location are returned to your hand and become available again for new assignments. The president stays on the board. You only have a limited number of assistants. Managing how many and where you deploy them, and how quickly they return to you, are an important aspect of the game.
In the screenshot above, the pawns are the presidents, and the cubes the assistants. At the bottom of each location you can see 5 rewards listed, for Power levels 1 to 5. These describe how strong your action is depending on Power level. In some cases you must have at least 2 or 3 Power to be able to gain anything from a location. Things you do at a location include gaining resources, taking orders, gaining techs, and converting resources to victory points. Orders are a way to convert resources to points. At any time you may pay the resources listed on an order to complete it and score it.

In addition to the main board, there are a number of management boards which represent specific locations on the main board. These three above are the Employment Agency, the Port and the Customs House. The Employment Agency is where you get to take more assistants, shops and trading houses into your hand, i.e. you come here to get more game pieces. Normally what you get at the start of the game won't be enough. To get shops and trading houses, you have to pay too. The Port is where orders can be taken. The Customs House is where you trade imported goods (the rarest resource type) for points.

These three management boards are the Dock, the Lab and the Church. The Dock works the same way as the Port. You come here to take orders. The Lab offers techs, which are permanent powers you get to enjoy for the rest of the game. The Church is for converting resources to points.
There is no fixed number of rounds. Instead you have 5 different ways a game can end. When you are unable to fill order spots at the Dock or the Port, the game ends. When you use the Church or the Customs House, you must leave behind an assistant. Once the total number of such committed assistants reaches a certain count, the game ends too. The final two ways the game ends are when any player builds all of his shops, or all of his trading houses. The players have some control over how the game ends and whether it ends at a time beneficial to them.
The Play
When I first started playing, the number of options was overwhelming. So much to do! I didn't have much idea what's best to do first. So I stuck to the general principles of resource conversion games - just try to gather resources as efficiently as possible. They will be useful sooner or later. This turned out to work well for me. In this aspect, Yokohama is similar to other resource conversion Eurogames. Being efficient is always good.
What stood out for me in Yokohama was the worker placement mechanism. It is quite different from typical worker placement games, so at first I didn't even think of it as worker placement. When you deploy assistants, you either deploy three to different locations, or two to a single location. Naturally, being able to deploy more is more efficient. However that means you need good forward planning. You can only use one location on your turn. Scattering assistants about means they will be stuck on the board for a longer time, waiting for the president to come and use them. Sometimes when you are in a hurry to achieve high Power at a location, you need to place two assistants there. Not ideal, but sometimes necessary. Since your assistants are paving the way for your president, you need to think ahead where your president wants to go. You also need to consider how much Power you need when your president eventually arrives at a location, so that prior to his arrival, you have already spent enough turns dropping in the required number of assistants. In my mind, this whole thing about a busy president's meeting schedule and a team of assistants scurrying around to make sure everything is properly arranged is the soul of the game. What the president actually does, i.e. the resource collection and conversion to points, are not particularly noteworthy. Sometimes you deploy an assistant to a location because the location is on the president's route, not because you actually want to use it. It is a little wasteful leaving this assistant there and never use him. If you can work this location into your strategy, it might be beneficial.
Positioning of your president is important because you can use him to hinder your opponents. When your president is present, your opponents' presidents may not use the location. Also they need to pay you if they want to place assistants, or if their presidents pass through. Money is tight. If you can extort some toll fees from your opponents, it's a good thing.
Watching how your opponents place their assistants is an early warning mechanism. You can roughly guess what they intend to do in the next few rounds and what strategies they are focusing on.
The board setup is random, so before the game starts you already need to analyse the board situation and have a rough idea how you want to play, and what strategies would be easier to execute.
The shops and trading houses are the engine-building aspect of the game. When you build them, you can gain points and other benefits. They permanently increase your Power at a location. If you intend to use a location frequently, you should build something there. It will save you assistants and time. It is a commitment not to be taken lightly though. If you end up not using the building much, it's a waste. Buildings are expensive.
The Power mechanism is interesting. You need to have 4 Power to construct a building, and getting to 4 Power takes some forward planning. Usually you will need to have three assistants supporting your president. You also need to make sure you have a building in hand. All locations give a bonus to the first visiting player to achieve 5 Power. That's yet another thing that causes competition among players.

My (red) president was on 1st row, 4th location. Han's (blue) president was on 2nd row, 1st location. Allen's (green) president was in his hand. When your president has no good place to go to, you may forfeit his action and take him back into your hand. Next turn you may deploy him anywhere instead of needing to move him step by step from one location to another. Forfeiting one action is usually not a good idea. It's almost equivalent to wasting one full turn.
You can see that each location has a brown card at its top right. The brown cards are construction sites. The four small spaces are for shops, and the one large space is for a trading house. If you look at 3rd row, 3rd location, both Han (blue) and I (red) have one shop.

In this particular game, most of the resource locations were on the right half of the board. Both the rightmost cards in the 1st row were fishing grounds. The rightmost card in the 2nd row was the tea plantation. The rightmost card in the 3rd row was the copper mine. Only the silk farm was on the left side, in the 4th row. Since I had decided to focus on resource collection, I spent most of my time on the right half of the board. Between the Dock (2nd row, 1st location) and the Port (4th row, 2nd location), the Port was nearer to where I operated, so I mostly took orders there, so that I didn't have to move far.

The three cards at the top left are the achievement cards. They are randomly drawn during game setup. When you fulfil the condition stated, you score points, without needing to consume any resources. The first player to fulfil the condition scores the point value on the left side of the card. Others who fulfil the condition later scores the point value on the right. These achievements give players another objective to aim for.
The card in the middle, next to the achievements, is an order card. It requires 4 tea and 1 silk, and it is worth 8 victory points. There is a country flag at the top of the order card. This particular order is from France. You score points for collecting country flags. There are five countries: France, England, Germany, USA and the Netherlands.
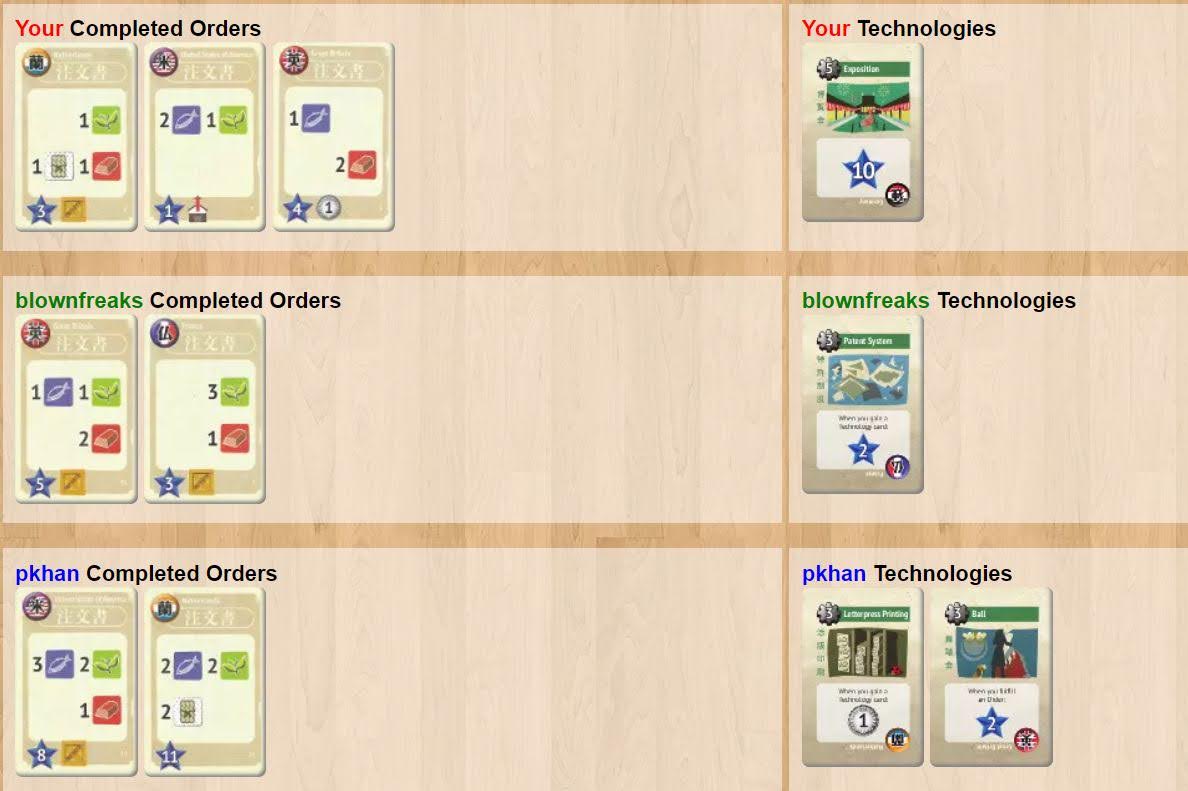
These are the completed orders and the claimed technologies. The technologies come with country flags too.

At this point the order deck had run out, and there was one spot at the Dock which could not be filled. The game end was now triggered. The current round would be completed, and then another full round played, before the game ended.

3rd row, 1st location was the Customs House. All three of us had committed some assistants here (cubes), and we all hoped to visit before game end to convert our imported goods to points. The game ended more abruptly that we had anticipated. We were not quite ready. I was earlier in turn order, and quickly went to the Customs House to surrender my imported goods. This was bad news for Allen and Han, because I now blocked this location from their presidents. Han still managed to use another method to trigger an action here, but it was a weaker version and did not score him as many points as he would have scored normally.

I (red) completed the most orders, while Han (blue) had the most techs.
The Thoughts
Yokohama is a resource collection and conversion game, which sounds boring and doesn't do it justice. I find the president and assistant management interesting. There are many things you can do, but you won't be able to maximise everything. You can only try your best to do as much as possible with as few actions as possible. There are no direct ways to attack your opponents, but there is certainly no lack of player interaction. How you position your president, how you race to grab various rewards, and the area majority contest are all ways you will compete. You can say it is peaceful competition, but it can be ruthless competition all the same. I find this a heavy game and wouldn't recommend it to new players, since there is a lot to take in at the same time. Not that it is very complex. It is the breadth that may be challenging for new players. For regular boardgamers, this game is rewarding to learn and play.
No comments:
Post a Comment